-
I am late to the party so I have only completed the 8 Small House 1 units so far. I realize this post is too late for everyone...03-24-2021, 11:30 AM
-
Most Color My World quilters probably think of you as the trouble shooter for all thing Color My World.
They may not...03-23-2021, 06:47 AM -
I moved the first of the year but I had ordered the fabric kit. Now when I opened it i didnt find any directions or the...03-22-2021, 12:38 PM
-
I’m jumping ahead a bit....made brown fusible bias for tree trunks & now experimenting with dif shapes & fabrics...03-21-2021, 05:37 PM
-
Thought I’d start a thread where those of us using wool can post on progress when using this alternative medium for this...03-19-2021, 04:31 PM
-
Because I am using a dark background I plan to make lighter coloured trees. I know that the 14 yards of bias tape required...03-17-2021, 07:39 PM
-
I can't find anything that mentions about what kind/size needle that is recommended if sewing with 60 wt thread on top and...03-14-2021, 08:04 PM
-
GENERAL INSTRUCTIONS
Each month, print the pages where you see a 1" square at 50%. Check accuracy: the square should measure 1/2" x 1/2".
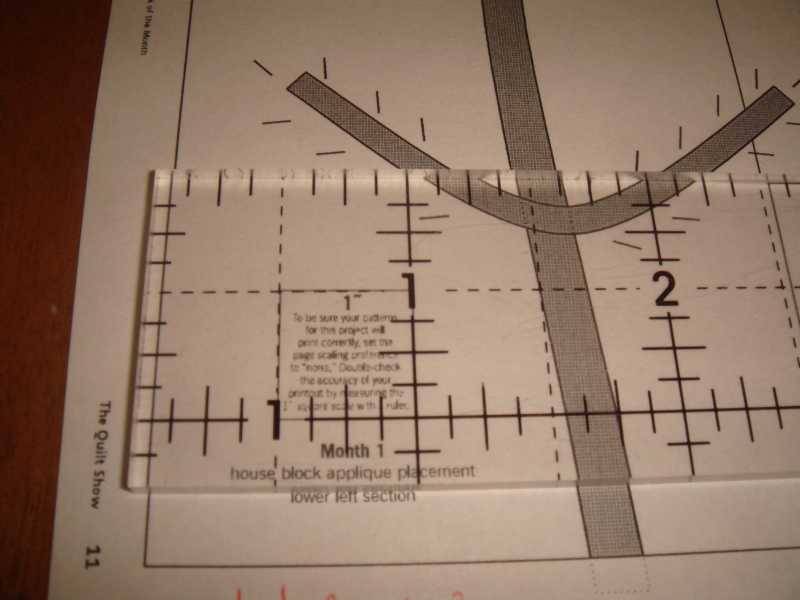
In general, to get the measurements for cutting half-size, you take the finished size, divide by 2, then add 1/4" on each side. That is when the patch sizes do not have extra for handling (when appliquéing for example). Whenever there is extra, I will mention how much is accounted for. That way, if you feel you need more or less, you can change the measurements accordingly. Other times, the patch is meant for cutting biais, or appliqué shapes. The formula doesn't apply in these cases.
Also, when I provide the measurements of a patch or a block, I will try to give the height X the width (as seen when looking at the quilt). Some of the measurements in the instructions are not given that way (usually the shortest measure is first).
I do this for fun. I do not promise that the instructions will be there when the month begins. I do provide these instructions as soon as I make the blocks myself (to make sure I get it right) - so they could be made available sometimes 1 to 2 weeks after the month begins. -
Month 1
BLOCK SIZES
House Block: 9" x 9"
Nine-Patch: 1-1/2" x1-1/2"
Patch sizes
A: 1" x 1" (used in the nine-patches)
B: 1-1/2" x 1-1/2"
C: 2"x 2"
D: this is used for heart appliqué background. After appliqué, the patch will be cut to 2" x 2" . I suggest 1/2" extra = 2-1/2" x 2-1/2"
ROOF:
Rectangle 1-1/2" x 4*1/2"
HOUSE:
Rectangle 3" x 4-1/2"
2 squares C (2" x 2")
DOOR BACKGROUND:
rectangle 2" x 1-1/2"
HOUSE BACKGROUND (sky):
2 rectangles 5-1/2" x 3-1/4" ( the 3-1/4" is oversize = finished size is 2-1/2", plus 2 x 1/4" seam allowance, plus 1/4" extra for handling)
1 strip 2-1/4" x 10" (both measures are oversized. Height = 2-1/4, finished size is 1-1/2",plus 2 x 1/4" seam allowance , plus 1/4" extra for handling; Width = 10", finished size is 9", plus 2 x 1/4" seam allowance, plus 2 x 1/4" extra (on each side) for handling).
2 squares B (1-1/2" x 1-1/2")
FRONT LAWN:
rectangle 3-1/4" x 10" (both measures are oversized. Height = 3-1/4 = finished size is 2-1/2",plus 2 x 1/4" seam allowance , plus 1/4" extra for handling; Width = 10", finished size is 9", plus 2 x 1/4" seam allowance, plus 2 x 1/4" extra (on each side) for handling). -
HOUSE BLOCK
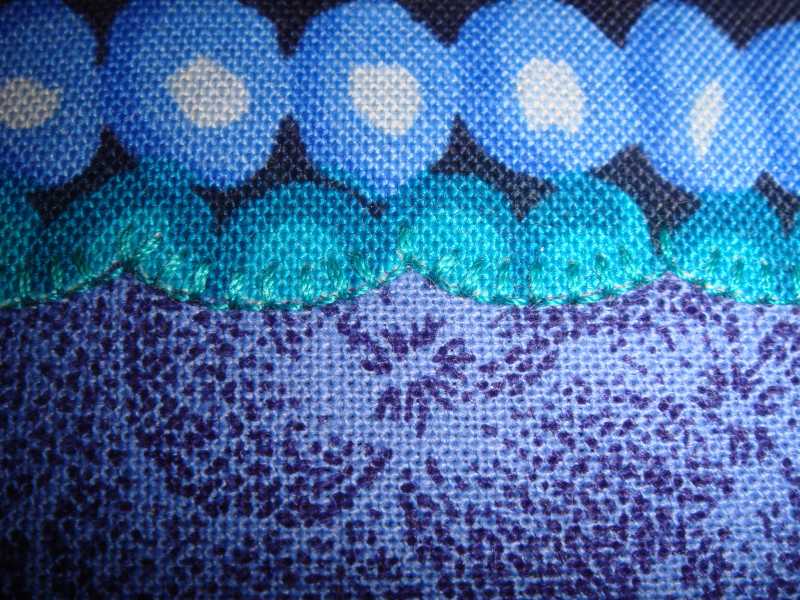
I thought that the roof trim appliqué was too narrow (1/8” at the widest point), so I decided to include this with the roof, and appliquéd the roof to the house.
Trace the trim on fusible web.
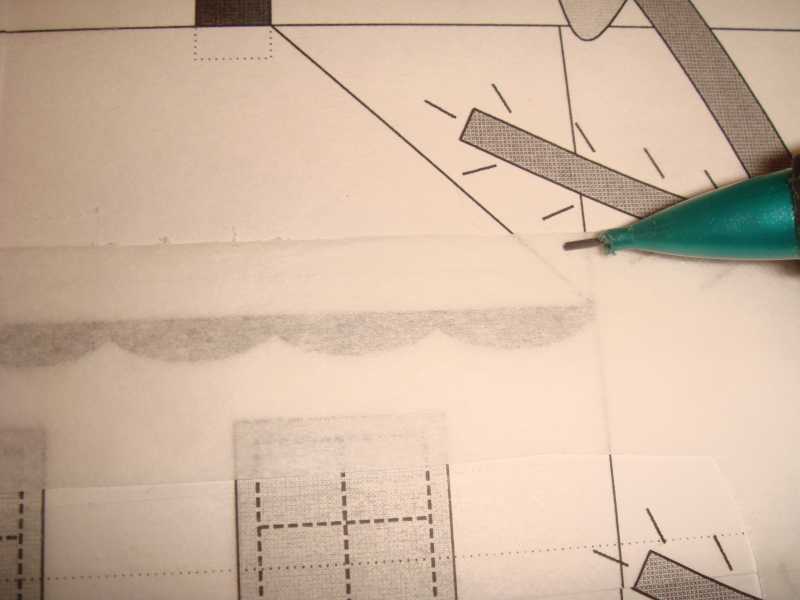
Fuse in place (in what would have been the seam allowance), with the tip ending at 1/4 from the raw edge. .
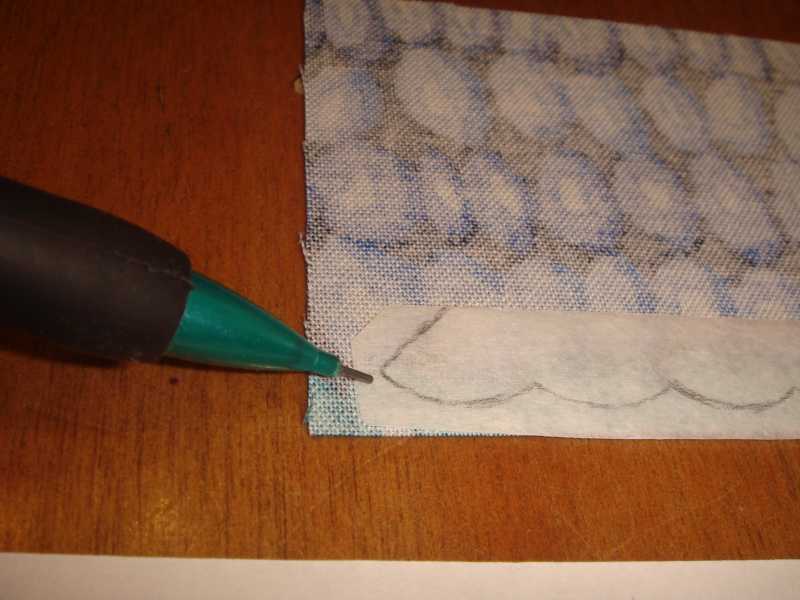
When cuting the seam allowance (on each side) cut at what would have been the stitching line.
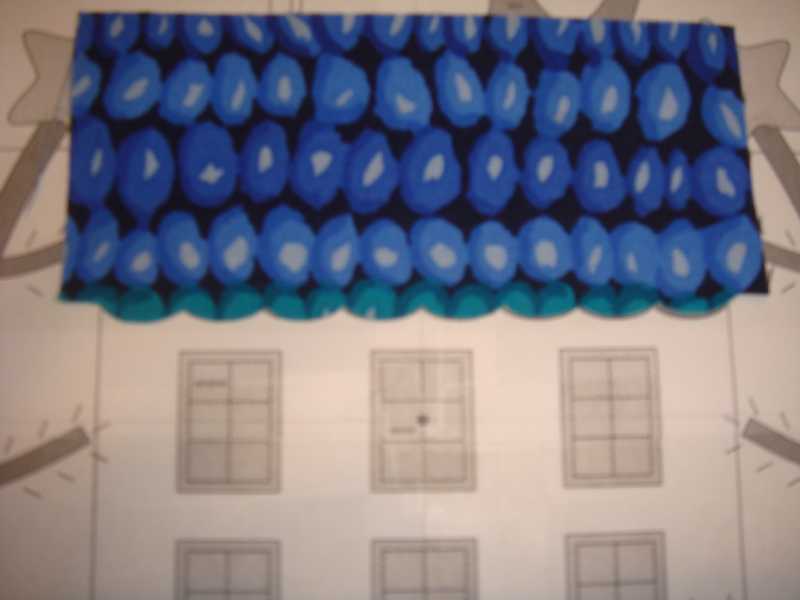
Align the appliqué with the stitching line of the house, and fuse in place.
This should measure 4” x 4-1/2”.
Draw a diagonal line, corner to corner, on the back of the SKY square 1-1/2” x 1-1/2”. Align each of the squares with each size of the roof (as per instruction) and stitch on the marked line.
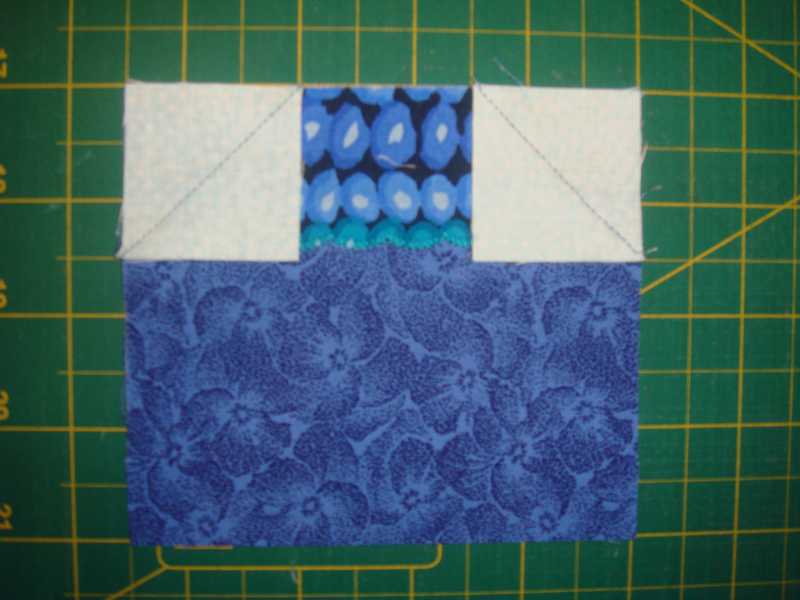
Trim the excess fabric. I pressed the seam allowance toward the roof.
Then, follow as per instructions. When joining the door background to the house’ C squares, and then to the house body, the complete house measures 5-1/2” x 4-1/2”.
When joining the SKY rectangles on each side of the house, this will measure 5-1/2” x 10”.
When joining the SKY strip (with the chimney),this will measure 7-1/4” x 10”.
Then....appliqué.... I’m not quite done yet, and I will not make the sheeps. So I added the LAWN to the bottom of the unit.
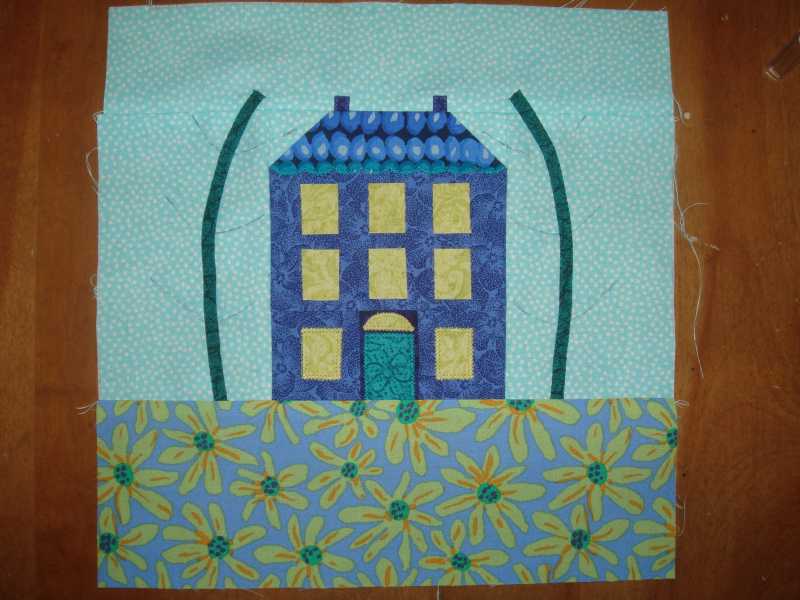
Once finished with appliqué, trim this to 9-1/2” x 9-1/2”.Comment
-
Wonderfully clear instructions Andrée, thank you, I really appreciate them. I love your fabrics and your lawn is so pretty. Are you doing raw edge applique or needle-turn?
Comment
-
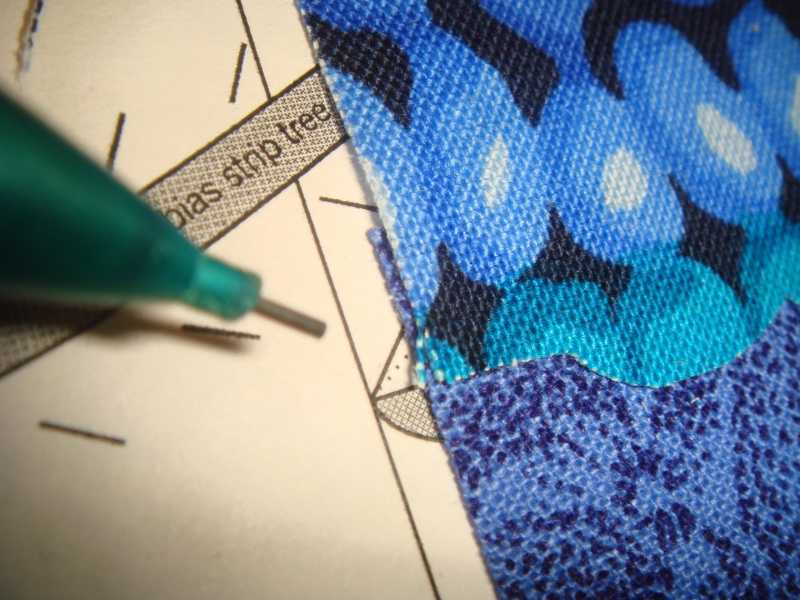
Thank you Rita. It's raw edge appliqué. The tree trunk was made using 5/8" biais, and folded in thirds. I hand appliqué using silk thread. For the tree branch, I prepared 3/8" biais folded in third, but I might follow the instructions since it's so small.
I'm not sure I will keep my original thought - to make this in Kaffe Fassett florals. All the patches are so small, we won't see the prints really. I may change my colorway. This one will become a cute mug rug! :cheer:
I also plan NOT to make the nine-patches, but instead use graph paper and paper-piece 3 strips for each of the lenghts (as if the nine-patch were sewn together). I'll post my results when this is done.
AndréeComment
-
The instructions are fantastic, Andrée, thank you for sharing them with the rest of us. I, too, am calculating the half-size because I've never done a half-sized quilt before, but definitely double-checking the numbers against yours. Also, you provided some very nice hints on how to do things so small! I might have to revert to full-size if this gets too hard (I've never done needle turn appliqué before and the small size might prove a bit difficult first time around). In any event, I'll give it a yeoman's effort!


Comment
-
Renata, if you look at the show with Lynette she demos how to turn the fabric with fusible interfacing and glue stick. She uses the Appliquik tool which I don't have so I used two cocktail sticks instead and they worked really well - even for the tiny birds wing. And if you tape 2 cocktail sticks together you will have a pronged fork for holding the appliqué while you use the other stick to turn in the edges. Any rough bits can be smoothed with another cocktail stick like Becky Goldsmith demos on the youtube videos I posted on another thread on the forum.Comment
-
Rita, thanks. I watched Becky Goldsmith's video series a couple of days ago and my improvement in needle turn was remarkable as a result (although I prefer to hold my needle as Liuxin Newman does rather than Becky Goldsmith and I still get good results). I also tried Lynette's method with fusible interfacing and the glue stick and did not have a problem with that either (you can also use the two-pronged bamboo party fork/sticks in place of the Appliquik tool). It's just that I don't know, as a first timer, whether I will run into big problems along the way or whether I will get frustrated with the half-size doing needle turn for the first time. However, I'm always good for a challenge! :blink:
Comment
-
Rita, I was wondering if you are having any problem stitching your applique with the stabilizer and glue on it? Are you doing hand stitching or machine?
Judy
Comment
-
Hi Judy, I have not had any trouble doing the hand stitching through stabilizer and glue. I do use a very fine long milliners needle and a thimble which both help.Comment
-
Thanks RitaComment
-
I sure could use some tech-y help....I would like to add Andree's instructions to my hard copy
pattern notebook. But when I try to print, I get a teeny font/pic size...impossible to read. I tried to up
the scaleing and I only get a partial page even at the lowest percentage...I use Firefox and Win 8.1
What am I not doing right here..or is there another way?? I had done this successfully on the old site.....
Comment
-
Marilyn, I don't use a PC but this is what I would do: I would highlight the text from Andrée's first instruction, copy it and then paste it to a word document. I would then do Andrée's second post in sections and again copy and paste. When I copied to my pages document on the Mac it was a reasonable size. I don't know if that's any help but it's the best I can offer.Comment
-
That's the way I did it Rita and it worked for me too. I use a laptop with windows 7 and access through google chrome.
Comment
-
I really enjoy needle turn applique. I need to go back and watch how Liuxin Newman holds here needles. I have learned tons from Becky Goldsmith. I tried using glue a while back and did not enjoy the process. To me it became more like doing a craft project than a sewing project. However, I will give it another try just in case I like it better now that I have more experience.
Comment
Comment