-
I am late to the party so I have only completed the 8 Small House 1 units so far. I realize this post is too late for everyone...03-24-2021, 11:30 AM
-
Most Color My World quilters probably think of you as the trouble shooter for all thing Color My World.
They may not...03-23-2021, 06:47 AM -
I moved the first of the year but I had ordered the fabric kit. Now when I opened it i didnt find any directions or the...03-22-2021, 12:38 PM
-
I’m jumping ahead a bit....made brown fusible bias for tree trunks & now experimenting with dif shapes & fabrics...03-21-2021, 05:37 PM
-
Thought I’d start a thread where those of us using wool can post on progress when using this alternative medium for this...03-19-2021, 04:31 PM
-
Because I am using a dark background I plan to make lighter coloured trees. I know that the 14 yards of bias tape required...03-17-2021, 07:39 PM
-
I can't find anything that mentions about what kind/size needle that is recommended if sewing with 60 wt thread on top and...03-14-2021, 08:04 PM
-
In case it's useful to anyone else, I printed out four copies of the swag sheet on Stable Stuff. Then I took a four new sheets of S/S, folded each one in three, and stapled each one around but underneath the printed swag on one of the four copies. Was then able to cut out the four sets of four. Did this for each, meaning used eight sheets of S/S rather than sixteen, only printed four and in effect only had to cut out four. -
Good tip Margie! Thanks!
It's Not What You Gather, But What You Scatter
That Tells What Kind Of Life You Have Lived ! -
I'm a very visual learner Margie. Do you have pictures of what you did?
from the beautiful Hudson Valley of NY
Gammill Classic Plus w/IQComment
-
Well, no, because all done. Perhaps if you think of it in terms of just one printout on S/S. Take a spare sheet, fan fold it in three and you'll see that that folded piece can sit comfortably behind the swag outline, with space to spare. In that space I just clicked here and there with the stapler, then just cut around one half of the two swag set, then the remaining swag, which was still held firm by the staples. So you've cut through four sheets of S/S at the one time.
from the beautiful Hudson Valley of NY
Gammill Classic Plus w/IQComment
-
Margie, thanks for the great tip! It always gratifying to be able to save time and still have a quality product.Originally posted by MargieN
from the Piedmont of North CarolinaComment
-
Margie, I appreciate your suggestion! Thanks....
Now I have a request. Not just for you, but for anyone posting about the Ruffled Roses BOM. In an effort to keep all the information for each month together in one place, please don't start a "NEW TOPIC", but just put your question and/or suggestions in the topic that I've already started for each pertinent month. That will make it much easier for someone looking for any information about the BOM to locate it, especially if they come to the party late!! :wink:
THANKS!
It's Not What You Gather, But What You Scatter
That Tells What Kind Of Life You Have Lived !Comment
-
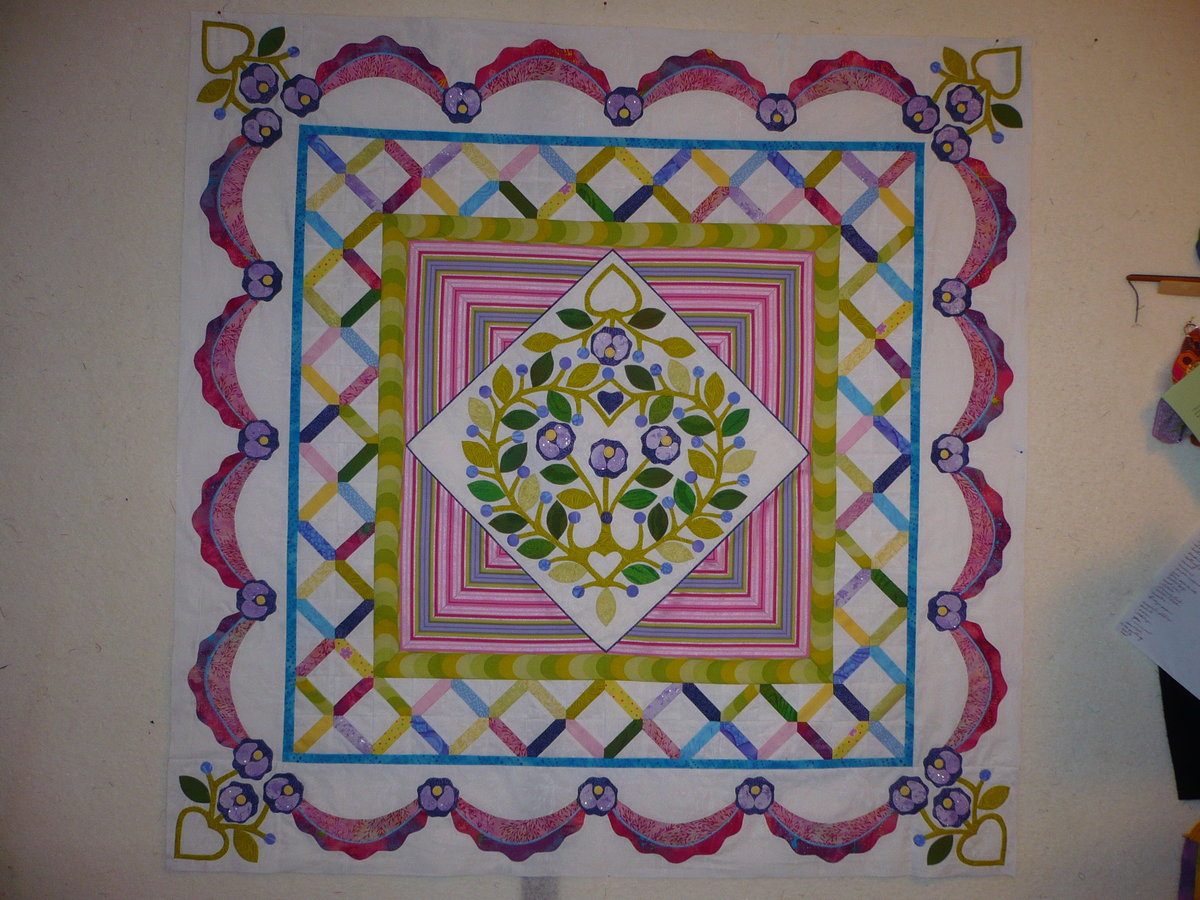
It has been very slow going (I only sew in the evenings), but I finally have all four borders of swags, sewn down. I will now start with my vines, flowers and hearts. I can't tell you how much I am enjoying this applique. I have changed my applique a bit, taking out a few things, and adding something different....but basically, I am following Sue's pattern.
It's Not What You Gather, But What You Scatter
That Tells What Kind Of Life You Have Lived !Comment
-
I'm slowly working on this project. I did finish the swags. I was so worried about getting all the pieces to fit; but it did and I love it!!!

Comment
-
Oh Terry - it is fabulous. The colors simply glow. This quilt is going to be amazing.
aka ladyquilter
Troutdale, OR
<!-- m --><a class="postlink" href="http://www.sweetpeaz.com/wordpress">http://www.sweetpeaz.com/wordpress</a><!-- m -->Comment
-
Terry, it is a long road but you're past one of the most difficult spots. your fabrics are beautiful- it looks like spring! Keep at it, slow is going to get it done. KathyComment
-
Thanks JoJo and Kathy! It helps that JoJo is working on this project too. She has helped me loads!!!Comment
-
Well done Terry, it looks great. I was trying to think of what came next? I think it's those little 4-patch on point thingys. I went badly wrong with those as my 1/4" seam guide wasn't! So I ended up out by 3 whole inches! You probably know this already but check your 1/4" is really that before you begin. There was also something in the instructions that was a little confusing at this point but I can't remember what it was. (That's a great help isn't it :roll: ) Anyway, good luck with the next step.

Comment
-
Terry, it looks wonderful!!
It's Not What You Gather, But What You Scatter
That Tells What Kind Of Life You Have Lived !Comment
-
Terry -
That's so beautiful! You are now officially ahead of me on this one. I'm still in the middle of appliquing the swags, but don't know when I'll get back to this one.
Nancy
Comment
-
Rita is right, next border is the most challenging in this quilt. Check the size of the four patches before sewing them into the border. Mine is hanging on the design wall mounted with this border and the rest of the quilt impatiently waiting in a box. I have had so much else to do, but I really don't like when I can't finish my project, so you bet I will come to it - hopefully soon.Originally posted by Reetzbobeetz
living in Central Denmark
Charlie Brown: The secret is to look fantastic at a distanceComment
Comment