Announcement
Collapse
No announcement yet.
[vb_side_1]
Latest Forum Posts
Collapse
-
by gjordanI’m trying to learn how to load photos. ...
-
Channel: BOM 2021 - Color My World
03-25-2021, 09:17 PM -
-
I am late to the party so I have only completed the 8 Small House 1 units so far. I realize this post is too late for everyone...
-
Channel: BOM 2021 - Color My World
03-24-2021, 11:30 AM -
-
by HelenWMost Color My World quilters probably think of you as the trouble shooter for all thing Color My World.
They may not...-
Channel: BOM 2021 - Color My World
03-23-2021, 06:47 AM -
-
I moved the first of the year but I had ordered the fabric kit. Now when I opened it i didnt find any directions or the...
-
Channel: BOM 2021 - Color My World
03-22-2021, 12:38 PM -
-
by midnight33I’m jumping ahead a bit....made brown fusible bias for tree trunks & now experimenting with dif shapes & fabrics...1 Photo
-
Channel: BOM 2021 - Color My World
03-21-2021, 05:37 PM -
-
by nhbasketsThought I’d start a thread where those of us using wool can post on progress when using this alternative medium for this...2 Photos
-
Channel: BOM 2021 - Color My World
03-19-2021, 04:31 PM -
-
Because I am using a dark background I plan to make lighter coloured trees. I know that the 14 yards of bias tape required...
-
Channel: BOM 2021 - Color My World
03-17-2021, 07:39 PM -
-
I can't find anything that mentions about what kind/size needle that is recommended if sewing with 60 wt thread on top and...
-
Channel: BOM 2021 - Color My World
03-14-2021, 08:04 PM -
Trending Forum Posts
Collapse
-
by gjordanI’m trying to learn how to load photos. ...
-
Channel: BOM 2021 - Color My World
03-25-2021, 09:17 PM -
-
I am late to the party so I have only completed the 8 Small House 1 units so far. I realize this post is too late for everyone...
-
Channel: BOM 2021 - Color My World
03-24-2021, 11:30 AM -
-
by HelenWMost Color My World quilters probably think of you as the trouble shooter for all thing Color My World.
They may not...-
Channel: BOM 2021 - Color My World
03-23-2021, 06:47 AM -
-
I moved the first of the year but I had ordered the fabric kit. Now when I opened it i didnt find any directions or the...
-
Channel: BOM 2021 - Color My World
03-22-2021, 12:38 PM -
-
by midnight33I’m jumping ahead a bit....made brown fusible bias for tree trunks & now experimenting with dif shapes & fabrics...1 Photo
-
Channel: BOM 2021 - Color My World
03-21-2021, 05:37 PM -
-
by nhbasketsThought I’d start a thread where those of us using wool can post on progress when using this alternative medium for this...2 Photos
-
Channel: BOM 2021 - Color My World
03-19-2021, 04:31 PM -
-
Because I am using a dark background I plan to make lighter coloured trees. I know that the 14 yards of bias tape required...
-
Channel: BOM 2021 - Color My World
03-17-2021, 07:39 PM -
-
I can't find anything that mentions about what kind/size needle that is recommended if sewing with 60 wt thread on top and...
-
Channel: BOM 2021 - Color My World
03-14-2021, 08:04 PM -
[vb_side_2]
[vb_main_1]
Month 1 The Halo Star Block
Collapse
X
-
-
-
-
Filter
-
Administrative
new posts
-
What a lovely focus fabric. The star is fabulous.
I'm back to work on the star. I waited for the wonderful QS piecing sheets to arrive. Based on a tip in another subject line - I tested to see if my printer ink would bleed. It most certainly did (even after heat setting). Because my background fabric is white, I can't leave the sheets in place. Just a word of caution to others who are new to the product. :dry:
Wendy
Alexandria, VA
- IP
-
Hi Olga,
I'm not sure I quite understand your question but I hope to help. Print out one test page till you get an accurate 1" test box. Note: it can be slightly off (and I mean slight) but over a number of blocks that difference adds up fast! Keep testing till you get that 1" -- over the course of the quilt it will save you a lot of heart ache.
For printing out paper piecing patterns,
1) Make sure your printer is set for "ACTUAL SIZE" or "SCALE 100%" or 100%
2) Turn off SCALING to "NO SCALING" or "NONE"
3) Turn off "FIT TO FRAME" or "FIT TO PAGE"
Of course TQS has a video on this topic by Margo Clabo which discusses printing and paper choices for paper piecing.
https://youtu.be/bgT2pWhwTaA
Judy
- IP
Comment
-
OlgaJo, the half square triangles are supposed to be slightly larger than 1". I suggest you measure the solid line on Units 6, 19, and 12, using page 9 as a visual guide. Those 3 Units will add up to 16" finished, giving you a 16.5" unfinished block. The math in a Feathered Star is not always the numbers we expect--that is why paper piecing is so great. It would be much more difficult to piece this block if you had to cut and piece each feather so it is "slightly" larger than 1" finished. I hope this information helps you.
https://bbquiltmaker.blogspot.com
North Alabama, USA
"I am a part of all that I have met" A. Lord Tennyson
- IP
Comment
-
For anyone still having a hard time getting a 16 1/2" block and having trouble getting a perfect 1/4" seam... I took a slightly different approach to getting the 1/4" seam right and it seems to be working so far.
Rather than testing the accuracy of the 1/4" seam in the more conventional way, I took one of the paper templates, cut on the line for the seam allowance and then used that as my test under the machine. I placed the needle on the paper seam line, placed a "purple thang" to the right butted up against the template, then stitched on the seam line of the paper template. If stitching stayed on the stitching line, then my purple thang was properly aligned and because I used the actual template, I knew I had a perfect 1/4" seam. Instead of the purple thang, you can use post-its or tape.
While I have not put all the blocks together to finalize the star block, ALL of my points are aligning perfectly so far.

- IP
Comment
-
For anyone still having a hard time getting a 16 1/2" block and having trouble getting a perfect 1/4" seam... I took a slightly different approach to getting the 1/4" seam right and it seems to be working so far.
Rather than testing the accuracy of the 1/4" seam in the more conventional way, I took one of the paper templates, cut on the line for the seam allowance and then used that as my test under the machine. I placed the needle on the paper seam line, placed a "purple thang" to the right butted up against the template, then stitched on the seam line of the paper template. If stitching stayed on the stitching line, then my purple thang was properly aligned and because I used the actual template, I knew I had a perfect 1/4" seam. Instead of the purple thang, you can use post-its or tape.
While I have not put all the blocks together to finalize the star block, ALL of my points are aligning perfectly so far. I hope my block will finish at 16 1/2"--it should, I'll let you know!


- IP
Comment
-
Thank you everyone for the help. I have tried several printouts - actual - 100%, increasing the %, and was finally able to get the right size block - butting 6, 9, and 12. It doesn't make sense, as my test block measures an exact inch on actual, but the block only measured 15 1/2. Now I just have to remember to print all my copies each month at 101%.
- IP
Comment
-
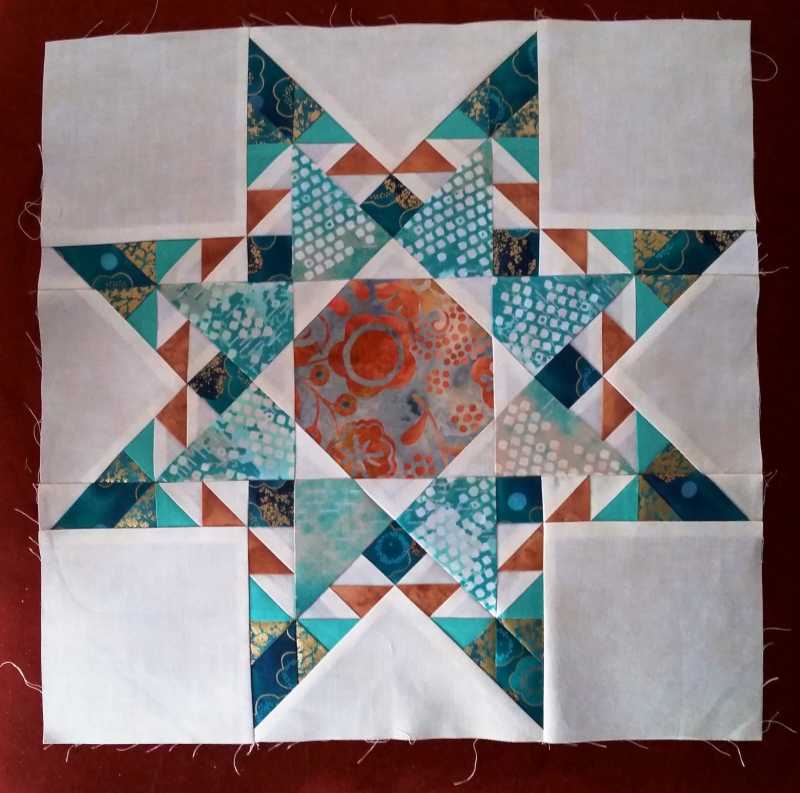
I finished the block. Here is the sample using the template as a guide for the 1/4" seam described above.Originally posted by "Renata" post=139148For anyone still having a hard time getting a 16 1/2" block and having trouble getting a perfect 1/4" seam... I took a slightly different approach to getting the 1/4" seam right and it seems to be working so far.
Rather than testing the accuracy of the 1/4" seam in the more conventional way, I took one of the paper templates, cut on the line for the seam allowance and then used that as my test under the machine. I placed the needle on the paper seam line, placed a "purple thang" to the right butted up against the template, then stitched on the seam line of the paper template. If stitching stayed on the stitching line, then my purple thang was properly aligned and because I used the actual template, I knew I had a perfect 1/4" seam. Instead of the purple thang, you can use post-its or tape.
While I have not put all the blocks together to finalize the star block, ALL of my points are aligning perfectly so far.

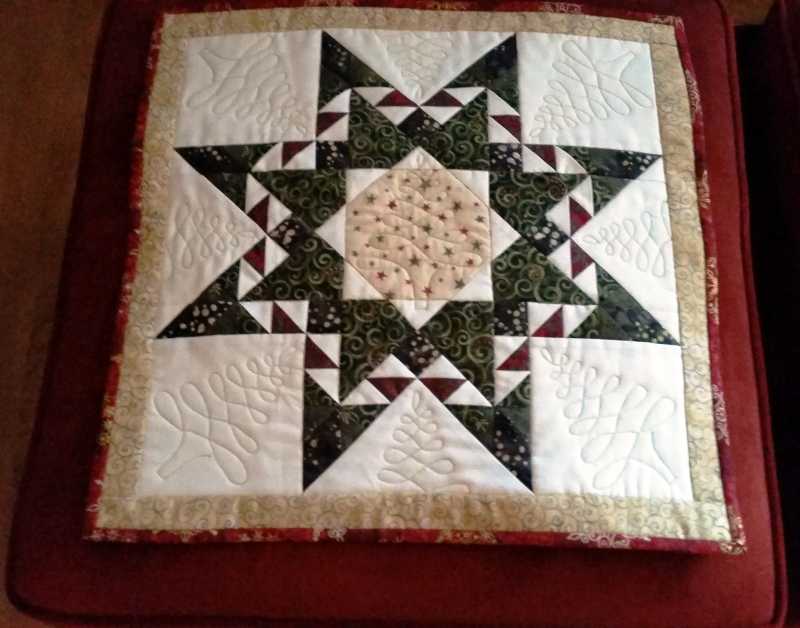
In addition to using the template as a guide to determine the perfect ¼”, I followed Sue Garman’s instruction on putting the individual blocks together and pulled paper off the back of those. However, I did not pull paper off the back of the blocks that did not require further assembly after the paper piecing was done (the middle block and the four corner blocks). When it was time to actually sew the blocks together in vertical rows, I used Wonder Clips to “pin” NOT the seam where I was going to sew the two blocks together, but on either side to keep the two blocks together and straight. I used pins where needed along the side where the blocks were to be sewn together and I made sure the seams kissed perfectly, then I sewed a basting stitch across (3.5 stitch length), on the seam line of the paper template, took off the Wonder Clips, checked to make sure everything looked good; if it did, I sewed over the same seam with a 2.0 stitch length. I took the papers off and pressed my seams. All of my vertical rows measure exactly 16 ½”. This worked for me much easier than with my first sample (Christmas table topper):

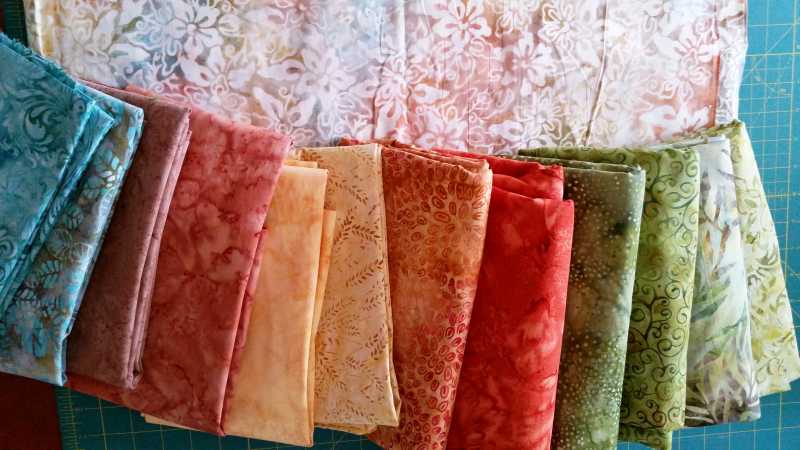
With the first sample, my block finished at 16" rather than 16 1/2". Since I paper-pieced and sewed exactly on the seams, I concluded that my problem was not having a perfect 1/4" seam. Using the paper template to set the 1/4" seam on my machine made the whole process a lot easier. Now I'm ready to move on to making the actual halo medallion block! My samples were all made with scraps. Here's my fabric selection for the BOM:


- IP
Comment
What's Going On
Collapse
There are currently 162 users online. 0 members and 162 guests.
Most users ever online was 4,446 at 07:08 AM on 07-28-2025.
Forum Stats
Collapse
Topics: 7,646
Posts: 144,737
Members: 16,641
Active Members: 5
Welcome to our newest member, Lev Anderson-LevTest1.
Latest Topics
Collapse
There are no results that meet this criteria.
Trending
Collapse
There are no results that meet this criteria.


Comment